
5. Orders
Orders are accepted through the front end of Kartris. But this is just the first step. The store owner will want to review orders, possibly check for fraud or other problems, and then assuming all is well, process them.
This section deals with processing orders and the various options and settings that affect the order process.

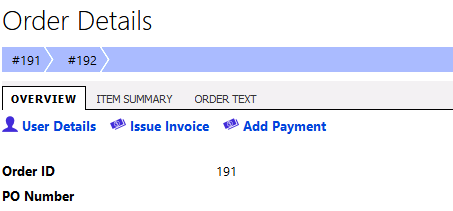
5.1. Finding orders
The first step to processing an order is to find it – there are several options for this in Kartris:
- The 'Orders' menu - this can bring up a list of orders filtered by various criteria such as recent, awaiting invoice, awaiting payment and so on.
- The main back end search box can find orders by ID.
- The search box on the orders list page can find orders by ID or date.
- Orders requiring attention (generally new orders) will show in the 'To do' list on the right hand side.
- You can click to view a customer's orders from either the customer listing, or the customer detail page; so if you need to find an order for a particular customer, you can find the customer by email or name (or part of) and then from there find their order(s).
- In Kartris 1.4x onwards, the order IDs on the customer's order history tab are also clickable.

5.2. Processing orders
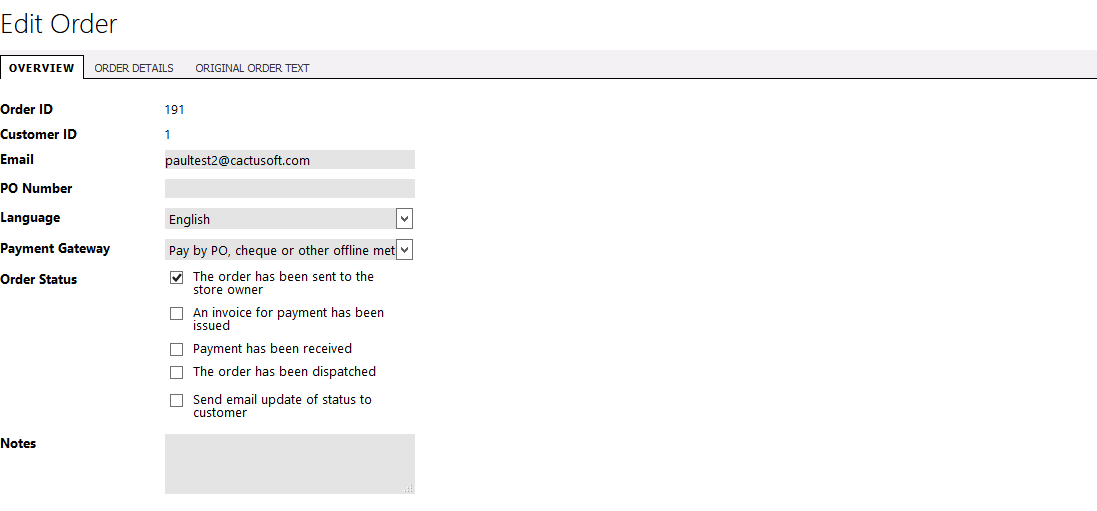
5.2.1. Order status

There are 4 stages for orders to move through. These are indicated by 'Order Status' checkboxes when viewing an order in the back end.
-
The order has been sent to the store owner – this box is checked when an order is successfully placed. Sometimes we refer to this simply as 'sent'.
-
An invoice for payment has been issued – this box is checked manually in the admin section to record that an invoice has been issued to the customer for payment.
-
Payment has been received – this box indicates that payment for the order was successfully received. In the case of an online payment, the callback process normally triggers this box to be checked automatically when a successful payment is made.
-
The order has been dispatched – this typically signifies that the order process is complete where payment was received via the web site. It is checked manually by the store owner once the order has been shipped. For orders that have been invoiced, this is of course not the end of the order process as payment is still awaited.
-
The order has been cancelled (Kartris v2.0+) – checking this box retains the order in the database, but cancels it from order totals and releases any stock items back to the store.
In the most common scenario where a customer makes an online payment for the items in their basket, the first three boxes will typically be checked, leaving only the dispatch of goods to be manually changed on the order.
You can see and also adjust the status of any order by changing the status checkboxes and saving:
5.2.2. Order progress
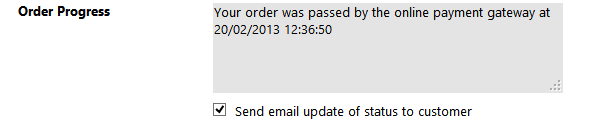
The 'Order Progress' box is normally updated automatically for online payments just to confirm the payment, but the admin user can add extra comments and choose whether to send the status update to the customer by email. This is a useful way of notifying the customers of shipping delays or any other issues that might affect their order. These comments can be viewed from the 'My Account's section if the customer logs in to check the order progress.
5.3. Editing orders
There are a few common situations which may require you to edit an order:
- The customer made a mistake, or changed their mind, and contacts you before you processed it
- You cannot obtain one or more items in the order
- The customer wanted to change address or some other detail
Rather than cancelling the order and letting the customer start again, you can choose to edit the order.
First, click to the order you wish to edit, and click the EDIT button at the top. You will see a multi-tabbed page, the first tab is the basic customer details.
The second tab is probably where most changes will be made as it lets you change the items in the order. When you first view this, the basket side to the right will be blank. Click the button to load the items from the original order into the basket.
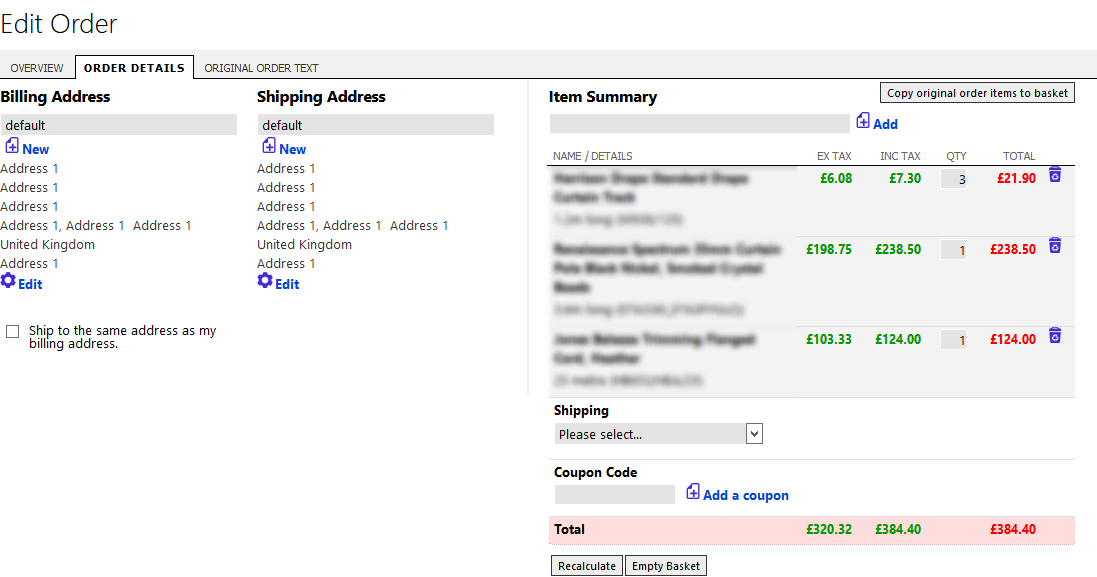
You will need to reselect shipping - you can flick to the original order text tab to see which method was used on the original order. Remember that if you've edited the items in the order, the weight or value of the edited order might mean that the shipping cost is different to before, or even that the method used on the original order is not available.
When you click to save the order, you'll see a confirmation popup.
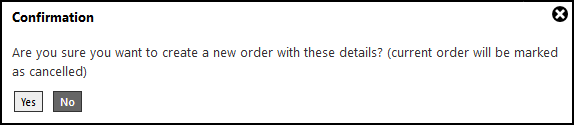
Clicking yes will create a new order from the edited details; the old one gets tagged as cancelled, but both remain linked. When you view either, you will see a breadcrumb trail that links them.
In many cases, if you edit basket items, the order value will change. If the customer has paid already online, you will then either need to collect more from them, or give a partial refund. Once you have done this, you can update the customers account using the payments page (Orders > Payments).
Enter the order number, click 'add' and the system will find the order and the payment required. You don't have to link payments to a specific order, so if you are giving a general account credit, or making some other adjustment, you can do that too.
If the payment is positive, that means you received more money from a customer. If you refunded a customer, show the payment as a negative value.
5.4. Creating new orders
The process is very similar to @5.3. Editing orders, but you start the process from Orders > Create a New Order.
5.5. Invoices and receipts
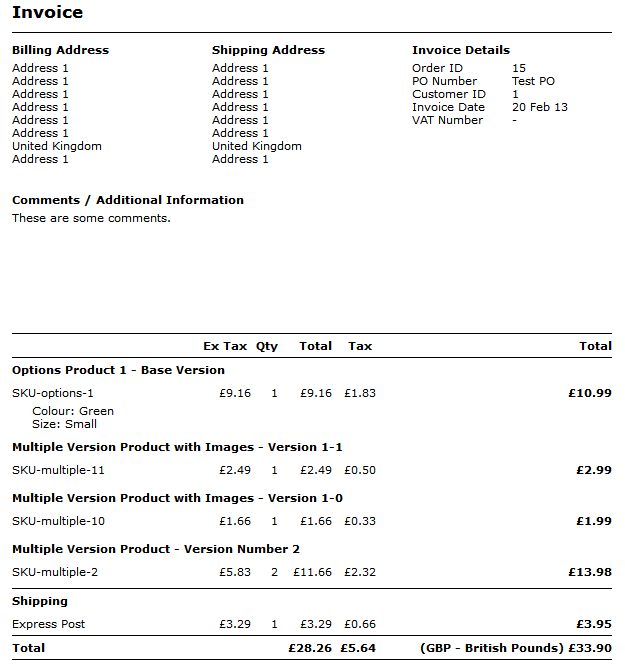
5.5.1. Issuing invoices
There is an 'Issue Invoice' link from each order. This can be used to view a print version of the invoice for printing if you require a customer be sent a print copy with their order, or by post to request payment. Note that viewing or printing this invoice does not automatically check the 'An invoice for payment has been issued' box. That box must be checked manually by the admin user to confirm that the invoice was sent to the customer.
Customers may view invoices from within their 'My Account' section in a print-ready format so some stores may decide to use this as the primary delivery method for invoices and receipts.
5.5.2. Customizing the invoice apperance
Invoices can be viewed from two places; in the back end (by store admins) and also by customers within the 'My account' section. The back end invoice always uses the Invoice.master template in the Admin skin. The front end invoice display uses an Invoice.master if one is present in the selected front end skin. Otherwise, it defaults to the Invoice.master in the Admin skin. These master pages are the place you need to edit if you wish to add header and footers to the invoice(s), or company logos.
If you need to edit the HTML layout of the invoice itself, for both cases, this uses the following file:
UserControls/General/Invoice.ascx
This is the place to edit if you need to add your VAT number or any other extra fields that will appear on every invoice.