
19.6.1. Setup
19.6.1.1. Setting up API access in MailChimp
First, you will need a MailChimp account. Login at https://login.mailchimp.com, or create an account if you don't have one.
Click on your username on the Right side of the Side and access the Account Menu.
Navigate to "Extras > API Keys"
Create an API Key if you don't have already one and note it down somewhere like a blank text file.
19.6.1.2. Creating a list for ecommerce users
On the upper menu click "Lists" and "Create a List"
Select the created list.
Go to the "List Settings > List name and defaults"
Find and copy the List Id from the screen, it should be top of the right hand column, and look something like this: 783d4b1dda.
19.6.1.3. Set up in backend of Kartris
Login to your Kartris back end.
Navigate to the Config Settings, then enter 'mailchimp' in the search box and click the search button. You should see the required config settings listed:
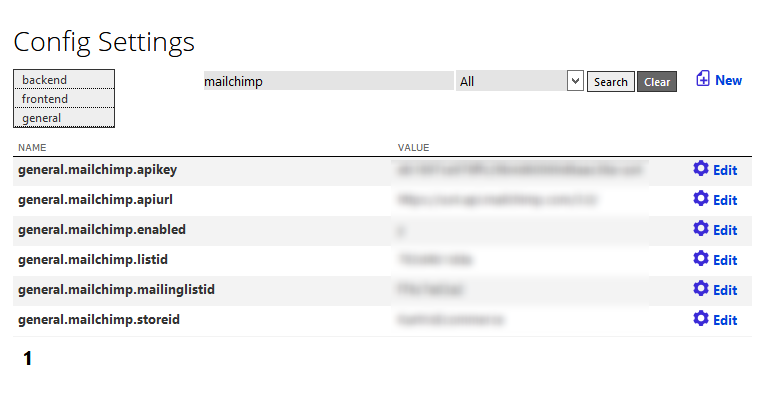
general.mailchimp.apikey - this is the API key you created or copied from the MailChimp back end in @19.6.1.1. Setting up API access in MailChimp
general.mailchimp.apiurl - This is the URL of the MailChimp API. This varies by account. For example, https://us4.api.mailchimp.com/3.0/ is the one we use, but the 'us4' part depends on the data centre of your account. You can tell this from the URL in the address bar of your browser when logged into MailChimp. The data centre is the first part of the URL, for example, ours shows https://us4.admin.mailchimp.com, hence the 'us4' for the API URL.
general.mailchimp.enabled - this one is simple enough. Needs to be 'y' to activate the MailChimp integration.
general.mailchimp.listid - this is the List ID you got in @19.6.1.2. Creating a list for ecommerce users
general.mailchimp.mailinglistid - Kartris can also use MailChimp to subscribe users to a general mailing list in MailChimp. This separates users who sign up to your newsletter, from ecommerce customers who purchase things through the site. Set up a list using the same steps as in @19.6.1.2. Creating a list for ecommerce users, or use an existing mailing list if you have one already.
general.mailchimp.storeid - Each 'store' in MailChimp needs a name. You can choose this, for example 'Kartris Ecommerce'. It will be registered through the API later.
19.6.1.4. Finishing off
Now you have all the settings and preparation done, the final step is to connect to MailChimp and create the new integration. In the Kartris back end, go to "Miscelleneous > MailChimp". This page should show the relevant MailChimp settings you've entered. You can name the store, enter your store's domain and your email address and then push the 'Create MailChimp Store' button.
This sends a request through to the MailChimp API which actually creates the new store record there.
You should see a confirmation of the result. If you get a message saying the Id already exists, that suggests that you already created this store previously.